
Ask your question and get a summary of the document by referencing this page and the AI provider of your choice
Version History
- "Add with option on CLI"v6.1.09/23/2025
- "Change behavior of the editor when the file extension is not `.json`"v6.0.19/22/2025
- "Add reexported command"v6.0.09/21/2025
- "Init history"v5.5.106/29/2025
If you have an idea for improving this documentation, please feel free to contribute by submitting a pull request on GitHub.
GitHub link to the documentationCopy doc Markdown to clipboard
Intlayer Visual Editor Documentation
The Intlayer Visual Editor is a tool that will wrap your website to interact with your content declaration files using a visual editor.
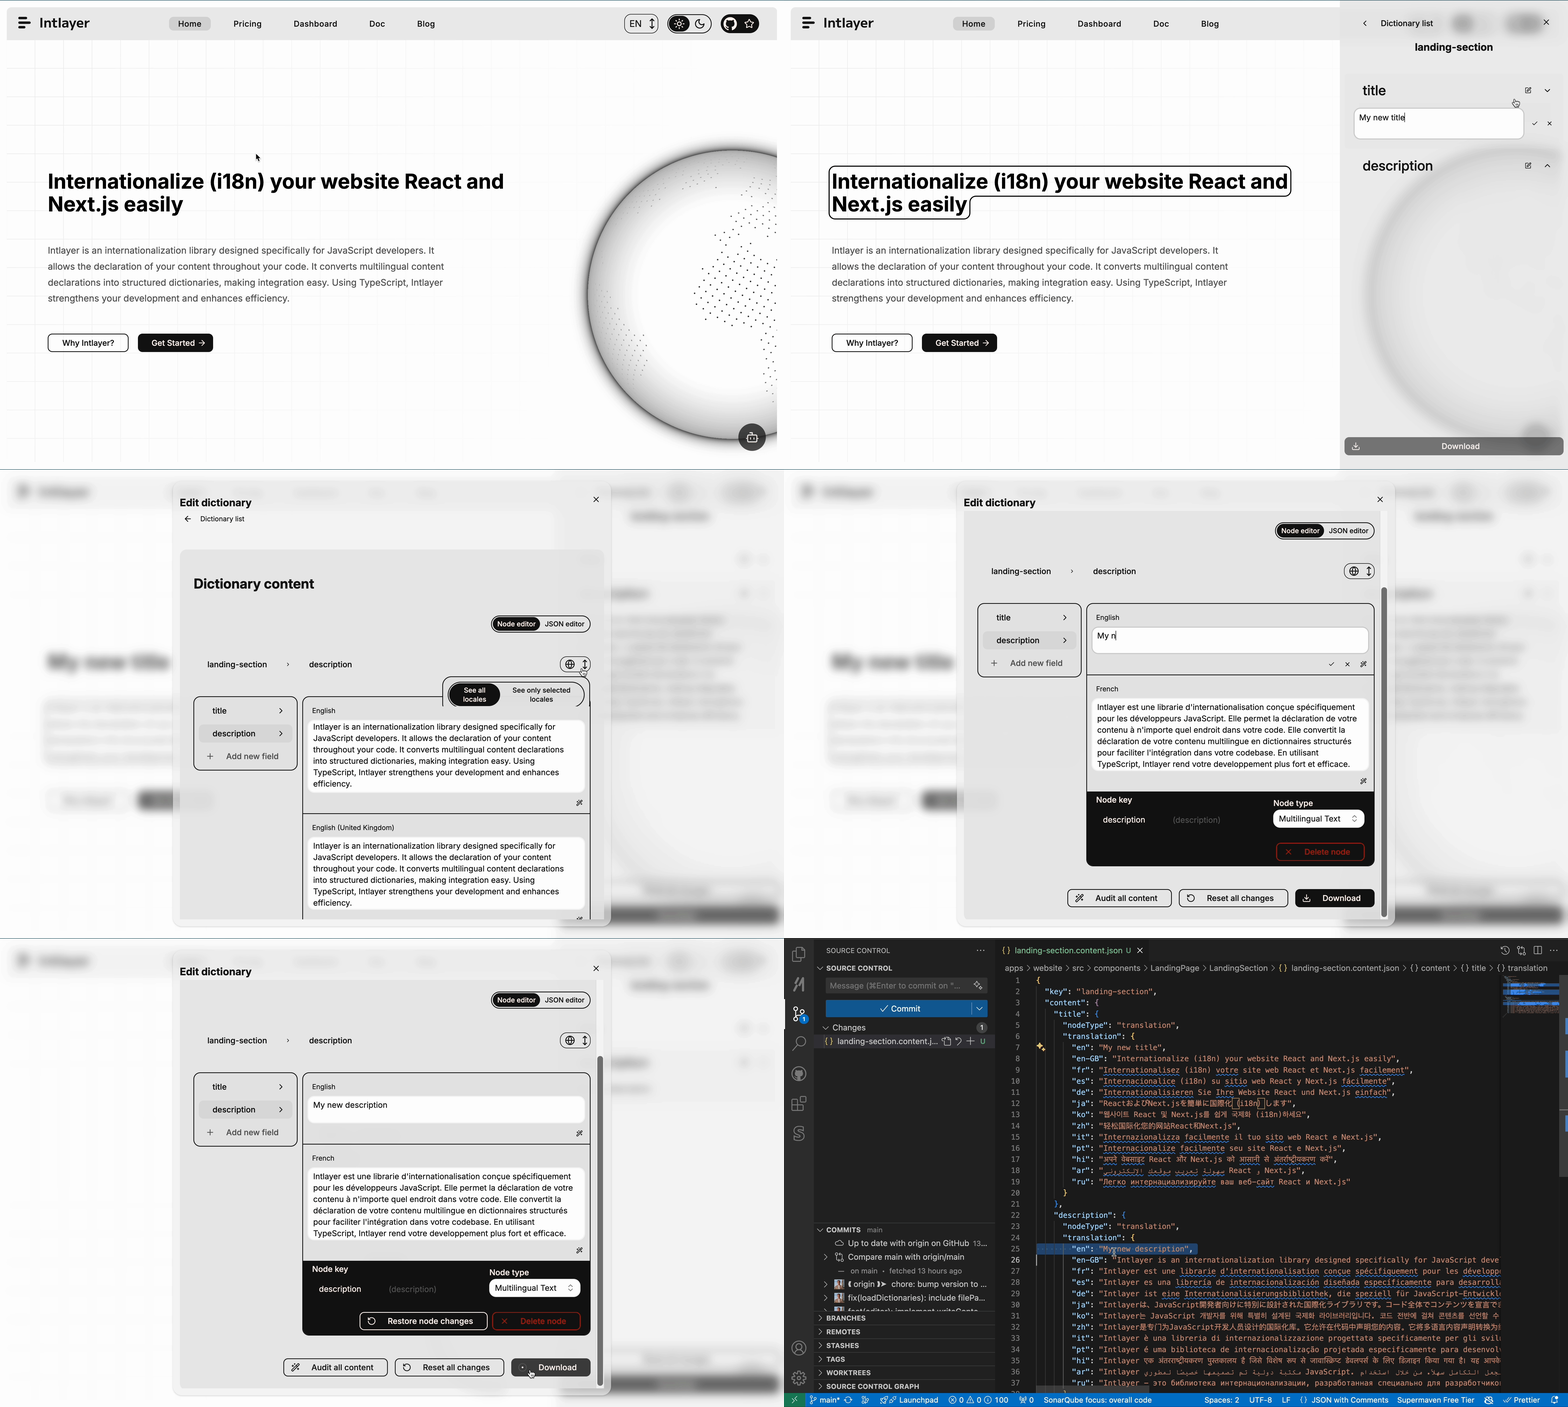
The intlayer-editor package is based on Intlayer and is available for JavaScript applications, such as React (Create React App), Vite + React, and Next.js.
Visual editor vs CMS
The Intlayer Visual editor is a tool that allows you to manage your content in a visual editor for local dictionaries. Once a change is made, the content will be replaced in the code-base. That means that the application will be rebuilt and the page will be reloaded to display the new content.
In contrast, the Intlayer CMS is a tool that allows you to manage your content in a visual editor for distant dictionaries. Once a change is made, the content will not impact your code-base. And the website will automatically display the changed content.
Integrate Intlayer into your application
For more details on how to integrate intlayer, see the relevant section below:
Integrating with Next.js
For integration with Next.js, refer to the setup guide.
Integrating with Create React App
For integration with Create React App, refer to the setup guide.
Integrating with Vite + React
For integration with Vite + React, refer to the setup guide.
How Intlayer Editor Works
The visual editor in an application that includes two things:
A frontend application that will display your website into a iframe. If your website uses Intlayer, the visual editor will automatically detect your content, and will allow you to interact with it. Once a modification is made, you will be able to download your changes.
Once you clicked the download button, the visual editor will send a request to the server to replace your content declaration files with the new content (wherever these files are declared in your project).
Note that Intlayer Editor will write your content declaration files as JSON if the file extension is.json. If the file extension is.ts,.tsx,.js,.jsx,.mjs,.cjs, it will write the file as a JavaScript file using a babel transformer.
Installation
Once Intlayer is configured in your project, simply install intlayer-editor as a development dependency:
Copy the code to the clipboard
With the --with flag, you can start the editor in parallel with another command:
Copy the code to the clipboard
Configuration
In your Intlayer configuration file, you can customize the editor settings:
Copy the code to the clipboard
import type { IntlayerConfig } from "intlayer";

const config: IntlayerConfig = {
  // ... other configuration settings
  editor: {
    /**
     * Required
     * The URL of the application.
     * This is the URL targeted by the visual editor.
     * Example: 'http://localhost:3000'
     */
    applicationURL: process.env.INTLAYER_APPLICATION_URL,
    /**
     * Optional
     * Default as `true`. If `false`, the editor is inactive and cannot be accessed.
     * Can be used to disable the editor for specific environments for security reason, such as production.
     */
    enabled: process.env.INTLAYER_ENABLED,
    /**
     * Optional
     * Default as `8000`.
     * The port of the editor server.
     */
    port: process.env.INTLAYER_PORT,
    /**
     * Optional
     * Default as "http://localhost:8000"
     * The URL of the editor server.
     */
    editorURL: process.env.INTLAYER_EDITOR_URL,
  },
};

export default config;
To see all available parameters, refer to the configuration documentation.
Using the Editor
When the editor is installed, you can start the editor using the following command:
bashCopy codeCopy the code to the clipboard
Note that you should run your application in parallel. The application URL should match the one you set in the editor configuration (
applicationURL).Note the command is reexported by the
intlayerpackage. You can usenpx intlayer editor startinstead.Then, open the URL provided. By default
http://localhost:8000.You can view each field indexed by Intlayer by hovering over your content with your cursor.

If your content is outlined, you can long-press it to display the edit drawer.
Environment configuration
The editor can be configured to use a specific environment file. This is useful when you want to use the same configuration file for development and production.
To use a specific environment file, you can use the --env-file or -f flag when starting the editor:
Copy the code to the clipboard
Note that the environment file should be located in the root directory of your project.
Or you can use the --env or -e flag to specify the environment:
Copy the code to the clipboard
Debug
If you encounter any issues with the visual editor, check the following:
The visual editor and the application are running.
The
editorconfiguration are correctly set in your Intlayer configuration file.- Required fields:
- The application URL should match the one you set in the editor configuration (
applicationURL).
- The application URL should match the one you set in the editor configuration (
- Required fields:
The visual editor use an iframe to display your website. Ensure that the Content Security Policy (CSP) of your website allows the CMS url as
frame-ancestors('http://localhost:8000' by default). Check the editor console for any error.