
このページとあなたの好きなAIアシスタントを使ってドキュメントを要約します
バージョン履歴
- "Solid の useIntlayer API の使用法を直接プロパティアクセスに更新"v8.9.02026/5/4
- "Astro + Svelteの初期ドキュメント"v8.7.72026/4/24
このページのコンテンツはAIを使用して翻訳されました。
英語の元のコンテンツの最新バージョンを見るこのドキュメントを改善するアイデアがある場合は、GitHubでプルリクエストを送信することで自由に貢献してください。
ドキュメントへのGitHubリンクドキュメントのMarkdownをクリップボードにコピー
Intlayerを使用したAstro + Svelteサイトの翻訳 | 国際化 (i18n)
目次
代替手段ではなく Interlayer を使用する理由
「astro-i18n」や「i18next」などの主要なソリューションと比較して、Intlayer は次のような統合された最適化を備えたソリューションです。
Astro を完全にカバー
Intlayer は、多言語ルーティング、サイトマップ、および国際化 (i18n) の拡張に必要なすべての機能を提供することで、Astro と完全に連携するように最適化されています。
バンドルサイズ
大量の JSON ファイルをページにロードするのではなく、必要なコンテンツのみをロードします。 Intlayer は、バンドルとページのサイズを最大 50% 削減するのに役立ちます。
保守性
アプリケーションのコンテンツのスコープを設定すると、大規模なアプリケーションの メンテナンスが容易になります。コンテンツ コードベース全体を確認するという精神的な負担を負うことなく、単一の機能フォルダーを複製または削除できます。さらに、Intlayer は完全に型指定されており、コンテンツの正確性を保証します。
AI エージェント
コンテンツを同じ場所に配置すると、大規模言語モデル (LLM) によって 必要なコンテキストが削減されます。 Intlayer には、翻訳の欠落をテストする CLI、LSP、MCP などのツール スイートも付属しています。および エージェント スキル により、AI エージェントの開発者エクスペリエンス (DX) がさらにスムーズになります。
オートメーション
AI プロバイダーの費用で、選択した LLM を使用して CI/CD パイプラインで自動化を変換します。 Intlayer は、コンテンツ抽出を自動化する コンパイラー と、バックグラウンドでの翻訳を支援する Web プラットフォーム も提供します。
パフォーマンス
大量の JSON ファイルをコンポーネントに接続すると、パフォーマンスと反応性の問題が発生する可能性があります。 Intlayer は、ビルド時のコンテンツの読み込みを最適化します。
非開発によるスケーリング
Intlayer は単なる i18n ソリューションではなく、自己ホスト型 ビジュアル エディター と 完全な CMS を提供します。 リアルタイムで多言語コンテンツを管理できるようになり、翻訳者、コピーライター、その他のチーム メンバーとのコラボレーションがシームレスになります。コンテンツはローカルおよび/またはリモートに保存できます。
Astro + SvelteへのIntlayer設定ステップバイステップガイド
GitHubでアプリケーションテンプレートを表示。
依存関係のインストール
お好みのパッケージマネージャーを使用して、必要なパッケージをインストールします:
bashコードをコピーコードをクリップボードにコピー
intlayer 設定管理、翻訳、コンテンツ宣言、トランスパイル、およびCLIコマンドのための国際化ツールを提供するコアパッケージ。
astro-intlayer IntlayerをViteバンドラーと統合するためのAstro統合プラグイン、およびユーザーの優先ロケールの検出、クッキーの管理、URLリダイレクトの処理を行うミドルウェアが含まれています。
svelte コアSvelteパッケージ。
svelte-intlayer IntlayerをSvelteアプリケーションと統合するパッケージ。Svelteにおける国際化のための
setupIntlayer、useIntlayer、およびuseLocaleストアを提供します。@astrojs/svelte Svelteコンポーネントアイランドの使用を可能にする公式のAstro統合。
プロジェクトの設定
アプリケーションの言語を設定するための設定ファイルを作成します:
intlayer.config.tsコードをコピーコードをクリップボードにコピー
この設定ファイルを使用して、ローカライズされたURL、ミドルウェアのリダイレクト、クッキー名、コンテンツ宣言の場所と拡張子、コンソールでのIntlayerログの無効化などを設定できます。利用可能なパラメータの全リストについては、設定ドキュメントを参照してください。
Astro設定へのIntlayerの統合
Astroの設定にintlayerプラグインとSvelte統合を追加します。
astro.config.tsコードをコピーコードをクリップボードにコピー
Astro統合プラグイン
intlayer()は、IntlayerをAstroと統合するために使用されます。コンテンツ宣言ファイルの構築を確実にし、開発モードで監視します。Astroアプリケーション内でIntlayerの環境変数を定義し、パフォーマンス最適化のためのエイリアスを提供します。svelte()統合により、client:only="svelte"を通じてSvelteコンポーネントアイランドを使用できるようになります。コンテンツの宣言
翻訳を保存するためのコンテンツ宣言を作成・管理します:
src/app.content.tsコードをコピーコードをクリップボードにコピー
コンテンツ宣言は、
contentDir(デフォルトは./src)に含まれ、コンテンツ宣言ファイルの拡張子(デフォルトは.content.{json,ts,tsx,js,jsx,mjs,cjs,md,mdx,yaml,yml})と一致していれば、アプリケーション内のどこにでも定義できます。詳細については、コンテンツ宣言のドキュメントを参照してください。
Astroでのコンテンツの使用
intlayerからエクスポートされたコアヘルパーを使用して、.astroファイル内で直接辞書を消費できます。また、各ページにhreflangや正規リンクなどのSEOメタデータを追加し、クライアントサイドのインタラクティブなコンテンツのためにSvelteアイランドを組み込む必要があります。src/pages/[...locale]/index.astroコードをコピーコードをクリップボードにコピー
alt、title、href、aria-labelなどの文字列属性でコンテンツを使用したい場合は、次のように関数の値を使用できます。htmlコードをコピーコードをクリップボードにコピー
ルーティング設定に関する注意: 使用するディレクトリ構造は、
intlayer.config.tsのmiddleware.routing設定によります:prefix-no-default(デフォルト): ルート(プレフィックスなし)にデフォルト言語を保持し、他の言語にはプレフィックスを付けます。すべてのケースをキャッチするために[...locale]を使用します。prefix-all: すべてのURLに言語プレフィックスが付きます。ルートを個別に処理する必要がない場合は、標準の[locale]を使用できます。search-paramまたはno-prefix: ロケールフォルダは不要です。ロケールは検索パラメータまたはクッキーを通じて処理されます。
Svelteアイランドコンポーネントの作成
Svelteアプリケーションをラップするアイランドコンポーネントを作成します。ストアにアクセスする前に、サーバーによって検出されたロケールを使用して
setupIntlayerを呼び出す必要があります。src/components/svelte/SvelteIsland.svelteコードをコピーコードをクリップボードにコピー
localeプロップはAstroページ(サーバー検出)から渡され、setupIntlayerを初期化するために使用されます。これにより、コンポーネント内のすべてのストアの初期ロケールとなります。言語切り替え機能の追加
言語切り替え機能はSvelteアイランド(ステップ6参照)に直接組み込まれています。
svelte-intlayerのuseLocaleを使用し、ユーザーが新しい言語を選択したときにローカライズされたURLに移動します:src/components/svelte/SvelteIsland.svelteコードをコピーコードをクリップボードにコピー
固定の維持に関する注意:
window.location.hrefを介したリダイレクトのためにonLocaleChangeを使用することで、新しい言語のURLが確実に訪問され、Intlayerミドルウェアが言語クッキーを設定して、将来の訪問時にユーザーの好みが記憶されるようになります。サイトマップとRobots.txt
Intlayerは、動的にローカライズされたサイトマップとrobots.txtファイルを生成するためのユーティリティを提供します。
サイトマップ
Intlayer には、アプリケーションのサイトマップを簡単に作成できるサイトマップ ジェネレーターが組み込まれています。ローカライズされたルートを処理し、検索エンジンに必要なメタデータを追加します。
Intlayer によって生成されたサイトマップは、
xhtml:link名前空間 (Hreflang XML Extensions) をサポートしています。生の URL のみを表示するデフォルトのサイトマップ ジェネレーターとは異なり、Intlayer はページのすべての言語バージョン (例:/about、/about?lang=fr、/about?lang=es) 間に必要な双方向リンクを自動的に作成します。これにより、検索エンジンが正しい言語バージョンを正しい対象者に正しくインデックス付けして提供できるようになります。すべてのローカライズされたルートを含むサイトマップを生成するために、
src/pages/sitemap.xml.tsを作成します。src/pages/sitemap.xml.tsコードをコピーコードをクリップボードにコピー
Robots.txt
検索エンジンのクロールを制御するために
src/pages/robots.txt.tsを作成します。src/pages/robots.txt.tsコードをコピーコードをクリップボードにコピー
Extract the content of your components
オプションIf you have an existing codebase, transforming thousands of files can be time-consuming.
To ease this process, Intlayer propose a compiler / extractor to transform your components and extract the content.
To set it up, you can add a
compilersection in yourintlayer.config.tsfile:intlayer.config.tsコードをコピーコードをクリップボードにコピー
import { type IntlayerConfig } from "intlayer"; const config: IntlayerConfig = { // ... Rest of your config compiler: { /** * Indicates if the compiler should be enabled. */ enabled: true, /** * Defines the output files path */ output: ({ fileName, extension }) => `./${fileName}${extension}`, /** * Indicates if the components should be saved after being transformed. * * - If `true`, the compiler will rewrite the component file in the disk. So the transformation will be permanent, and the compiler will skip the transformation for the next process. That way, the compiler can transform the app, and then it can be removed. * * - If `false`, the compiler will inject the `useIntlayer()` function call into the code in the build output only, and keep the base codebase intact. The transformation will be done only in memory. */ saveComponents: false, /** * Dictionary key prefix */ dictionaryKeyPrefix: "", }, }; export default config;Run the extractor to transform your components and extract the content
bashコードをコピーコードをクリップボードにコピー
TypeScriptの設定
Intlayerはモジュール拡張を使用してTypeScriptの利点を活かし、コードベースをより堅牢にします。

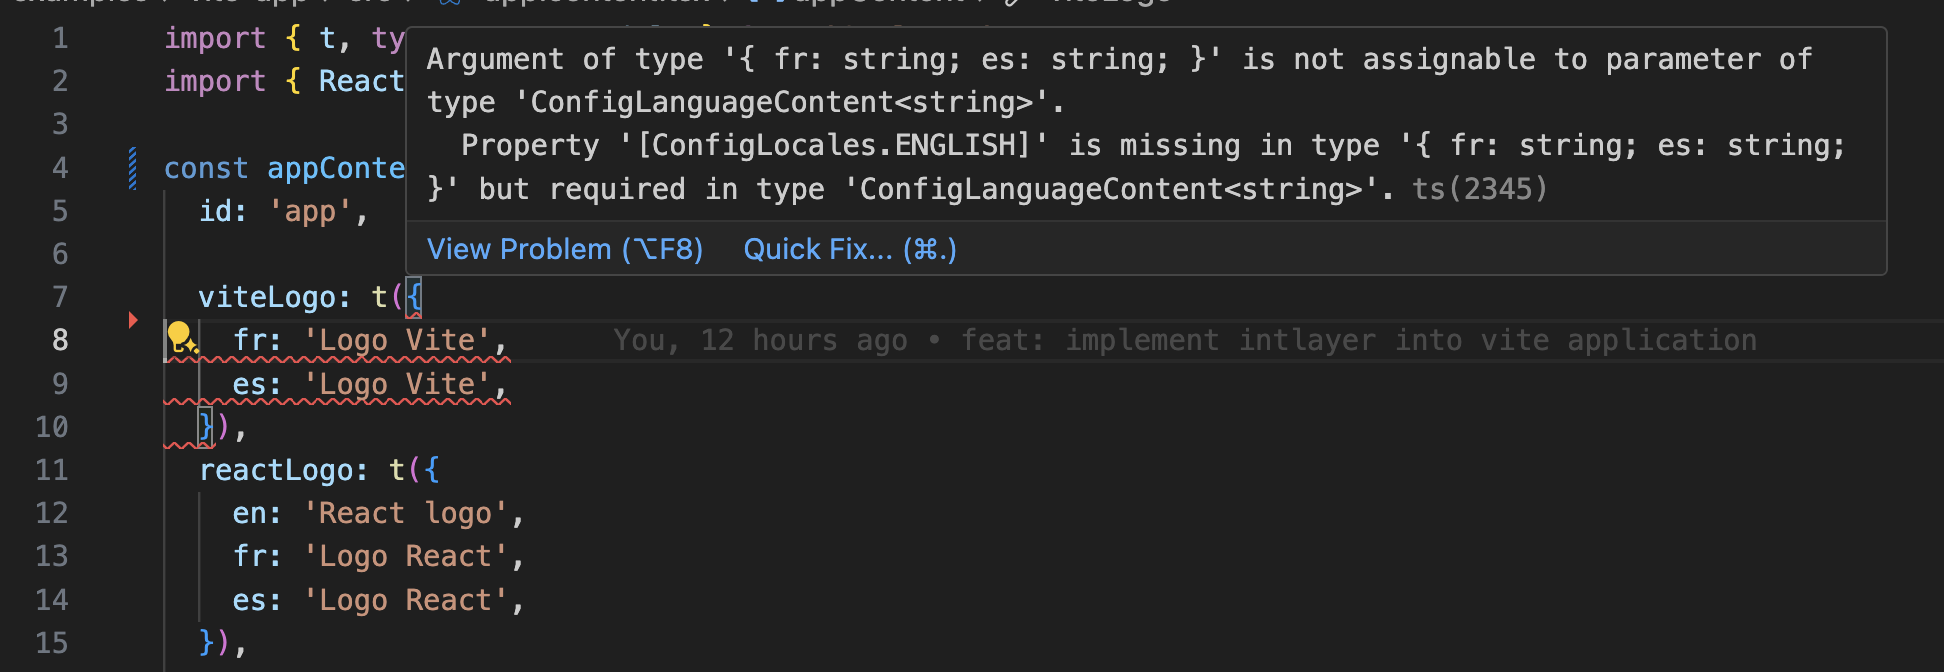
TypeScriptの設定に自動生成された型が含まれていることを確認してください。
コードをクリップボードにコピー
Gitの設定
Intlayerによって生成されたファイルを無視することをお勧めします。これにより、それらをGitリポジトリにコミットすることを避けることができます。
そのためには、.gitignoreファイルに以下の指示を追加してください:
コードをクリップボードにコピー
VS Code拡張機能
Intlayerを使用した開発体験を向上させるために、公式のIntlayer VS Code拡張機能をインストールできます。
この拡張機能は以下を提供します:
- 翻訳キーのオートコンプリート。
- 欠落している翻訳のリアルタイムエラー検出。
- 翻訳されたコンテンツのインラインプレビュー。
- 翻訳を簡単に作成・更新するためのクイックアクション。
拡張機能の使用方法の詳細については、Intlayer VS Code拡張機能のドキュメントを参照してください。
さらに詳しく
さらに詳しく知りたい場合は、ビジュアルエディターを実装したり、CMSを使用してコンテンツを外部化したりすることもできます。