
استخدم مساعدك المفضل للملخص واستخدم هذه الصفحة والموفر AI الذي تريده
تاريخ الإصدارات
- "تحديث استخدام واجهة برمجة تطبيقات useIntlayer في Solid للوصول المباشر إلى الخصائص"v8.9.0٤/٥/٢٠٢٦
- "إضافة أمر init"v7.5.9٣٠/١٢/٢٠٢٥
- "تحديث تكامل وتهيئة واستخدام Astro"v6.2.0٣/١٠/٢٠٢٥
تمت ترجمة محتوى هذه الصفحة باستخدام الذكاء الاصطناعي.
اعرض آخر نسخة المحتوى الأصلي باللغة الإنكليزيةإذا كان لديك فكرة لتحسين هذه الوثيقة، فلا تتردد في المساهمة من خلال تقديم طلب سحب على GitHub.
رابط GitHub للتوثيقنسخ الـ Markdown من المستند إلى الحافظة
ترجمة موقع Astro + React الخاص بك باستخدام Intlayer | التدويل (i18n)
جدول المحتويات
لماذا Intlayer على البدائل؟
بالمقارنة مع الحلول الرئيسية مثل astro-i18n أو i18next، يعد Intlayer حلاً يأتي مزودًا بتحسينات متكاملة مثل:
تغطية استرو كاملة
تم تحسين Intlayer للعمل بشكل مثالي مع Astro من خلال تقديم توجيه متعدد اللغات وخريطة الموقع وجميع الميزات اللازمة لتوسيع نطاق التدويل (i18n).
حجم البندل
بدلاً من تحميل ملفات JSON ضخمة إلى صفحاتك، قم بتحميل المحتوى الضروري فقط. يساعد Intlayer في تقليل أحجام البندل وصفحاتك بنسبة تصل إلى 50%.
الصيانة
يؤدي تحديد نطاق محتوى تطبيقك إلى تسهيل الصيانة للتطبيقات واسعة النطاق. يمكنك تكرار أو حذف مجلد ميزات واحد دون العبء العقلي لمراجعة قاعدة بيانات المحتوى بالكامل. بالإضافة إلى ذلك، تتم كتابة Intlayer بالكامل لضمان دقة المحتوى الخاص بك.
وكيل الذكاء الاصطناعي
يؤدي تحديد موقع المحتوى المشترك إلى تقليل السياق المطلوب بواسطة نماذج اللغات الكبيرة (LLMs). يأتي Intlayer أيضًا مزودًا بمجموعة من الأدوات، مثل CLI لاختبار الترجمات المفقودة،LSP، MCP ومهارات الوكيل، لجعل تجربة المطور (DX) أكثر سلاسة للذكاء الاصطناعي وكلاء.
الأتمتة
استخدم الأتمتة للترجمة في مسار CI/CD الخاص بك باستخدام LLM من اختيارك على حساب مزود الذكاء الاصطناعي الخاص بك. يقدم Intlayer أيضًا مترجمًا لأتمتة استخراج المحتوى، بالإضافة إلى منصة ويب للمساعدة في الترجمة في الخلفية.
أداء
يمكن أن يؤدي ربط ملفات JSON الضخمة بالمكونات إلى حدوث مشكلات في الأداء والتفاعل. يعمل Intlayer على تحسين تحميل المحتوى الخاص بك في وقت الإنشاء.
التحجيم مع عدم وجود مطور
أكثر من مجرد حل i18n، يوفر Intlayer [محررًا مرئيًا] مستضافًا ذاتيًا](/ar/doc/concept/editor) وكامل CMS لمساعدتك في إدارة المحتوى متعدد اللغات في الوقت الفعلي، مما يجعل التعاون مع المترجمين ومؤلفي النصوص وأعضاء الفريق الآخرين سلسًا. يمكن تخزين المحتوى محليًا و/أو عن بعد.
دليل خطوة بخطوة لتهيئة Intlayer في Astro + React
تحقق من نموذج التطبيق على GitHub.
تثبيت التبعيات
قم بتثبيت الحزم اللازمة باستخدام مدير الحزم المفضل لديك:
bashنسخ الكودنسخ الكود إلى الحافظة
intlayer الحزمة الأساسية التي توفر أدوات i18n لإدارة التكوين، الترجمات، تعريف المحتوى، التحويل، وأوامر CLI.
astro-intlayer تتضمن إضافة تكامل Astro لربط Intlayer بـ Vite bundler، بالإضافة إلى وسيط (middleware) لاكتشاف لغة المستخدم المفضلة، وإدارة ملفات تعريف الارتباط (cookies)، والتعامل مع إعادة توجيه الروابط.
react, react-dom حزم React الأساسية المطلوبة لرندر مكونات React في المتصفح.
react-intlayer حزمة لدمج Intlayer في تطبيقات React. توفر
IntlayerProviderبالإضافة إلى الخطافات (hooks)useIntlayerوuseLocaleللتدويل في React.@astrojs/react إضافة Astro الرسمية التي تتيح استخدام جزر (islands) مكونات React.
تهيئة مشروعك
أنشئ ملف تكوين لتحديد لغات تطبيقك:
intlayer.config.tsنسخ الكودنسخ الكود إلى الحافظة
من خلال ملف التكوين هذا، يمكنك تهيئة الروابط المترجمة، وإعادة توجيه الوسيط، وأسماء الكوكيز، وموقع وامتدادات تعريفات المحتوى، وتعطيل سجلات Intlayer في وحدة التحكم، والمزيد. للحصول على قائمة كاملة بالمعلمات المتاحة، راجع توثيق التهيئة.
دمج Intlayer في تكوين Astro الخاص بك
أضف إضافة
intlayerوتكامل React إلى تكوين Astro الخاص بك.astro.config.tsنسخ الكودنسخ الكود إلى الحافظة
تُستخدم إضافة
intlayer()لدمج Intlayer مع Astro. وهي تضمن إنشاء ملفات تعريف المحتوى ومراقبتها في وضع التطوير. وتعرّف متغيرات بيئة Intlayer داخل تطبيق Astro وتوفر أسماء مستعارة لتحسين الأداء.يتيح تكامل
react()استخدام جزر مكونات React عبرclient:only="react".تعريف المحتوى الخاص بك
أنشئ وأدِر تعريفات المحتوى لتخزين الترجمات:
src/app.content.tsxنسخ الكودنسخ الكود إلى الحافظة
يمكن تعريف تعريفات المحتوى في أي مكان في تطبيقك، طالما أنها مدرجة في
contentDir(افتراضيًا./src) وتطابق امتداد ملف تعريف المحتوى (افتراضيًا.content.{json,ts,tsx,js,jsx,mjs,cjs,md,mdx,yaml,yml}).لمزيد من المعلومات، راجع توثيق تعريف المحتوى.
استخدام المحتوى في Astro
يمكنك استهلاك القواميس مباشرة في ملفات
.astroالخاصة بك باستخدام المساعدين الأساسيين المصدرين منintlayer. يجب عليك أيضًا إضافة ميتا داتا SEO (مثل hreflang وروابط canonical) لكل صفحة وتقديم جزيرة React للمحتوى التفاعلي في جانب العميل.src/pages/[...locale]/index.astroنسخ الكودنسخ الكود إلى الحافظة
إذا كنت ترغب في استخدام محتواك في سمة
سلسلة(string)، مثلaltوtitleوhrefوaria-labelوما إلى ذلك، يمكنك استخدام قيمة الدالة، مثل:htmlنسخ الكودنسخ الكود إلى الحافظة
ملاحظة حول إعداد التوجيه: تعتمد بنية الدليل التي تستخدمها على إعداد
middleware.routingفيintlayer.config.ts:prefix-no-default(افتراضي): يحافظ على اللغة الافتراضية في الجذر (بدون بادئة) ويضيف بادئات للغات الأخرى. استخدم[...locale]لتغطية جميع الحالات.prefix-all: تحصل جميع الروابط على بادئة لغة. يمكنك استخدام[locale]القياسي إذا كنت لا تحتاج إلى معالجة الجذر بشكل منفصل.search-paramأوno-prefix: لا يلزم وجود أدلة لغة. يتم التعامل مع اللغة عبر معلمات الاستعلام أو ملفات تعريف الارتباط.
إنشاء مكون جزيرة React
أنشئ مكون جزيرة يلف تطبيق React الخاص بك ويستلم اللغة المكتشفة من الخادم:
src/components/react/ReactIsland.tsxنسخ الكودنسخ الكود إلى الحافظة
يتم تمرير خاصية
localeمن صفحة Astro (اكتشاف الخادم) إلىIntlayerProvider، مما يجعلها اللغة الأولية لجميع خطافات React داخل الشجرة.إضافة مبدل اللغة
أنشئ مكون React
LocaleSwitcherيقرأ اللغات المتاحة وينتقل إلى الرابط المترجم عندما يختار المستخدم لغة جديدة:src/components/react/LocaleSwitcher.tsxنسخ الكودنسخ الكود إلى الحافظة
ملاحظة حول الاستمرارية: يضمن استخدام
onLocaleChangeلإعادة التوجيه عبرwindow.location.hrefزيارة الرابط الجديد للغة، مما يسمح لوسيط Intlayer بتعيين كوكيز اللغة وتذكر تفضيلات المستخدم في الزيارات المستقبلية.يجب رندر
LocaleSwitcherداخلIntlayerProvider- استخدمه داخل مكون الجزيرة الخاص بك (كما هو موضح في الخطوة 6).خريطة الموقع وRobots.txt
توفر Intlayer أدوات لإنشاء خريطة موقع مترجمة وملفات robots.txt ديناميكيًا.
خريطة الموقع (Sitemap)
Intlayer comes with a built-in sitemap generator to help you create a sitemap for your application easily. It handles localized routes and adds the necessary metadata for search engines.
The Intlayer generated sitemap supports the
xhtml:linknamespace (Hreflang XML Extensions). Unlike the default sitemap generators that only list raw URLs, Intlayer automatically creates the required bidirectional links between all language versions of a page (e.g.,/about,/about?lang=fr, and/about?lang=es). This ensures search engines correctly index and serve the right language version to the right audience.أنشئ
src/pages/sitemap.xml.tsلإنشاء خريطة موقع تتضمن جميع مساراتك المترجمة.src/pages/sitemap.xml.tsنسخ الكودنسخ الكود إلى الحافظة
Robots.txt
أنشئ
src/pages/robots.txt.tsللتحكم في زحف محركات البحث.src/pages/robots.txt.tsنسخ الكودنسخ الكود إلى الحافظة
Extract the content of your components
اختياريIf you have an existing codebase, transforming thousands of files can be time-consuming.
To ease this process, Intlayer propose a compiler / extractor to transform your components and extract the content.
To set it up, you can add a
compilersection in yourintlayer.config.tsfile:intlayer.config.tsنسخ الكودنسخ الكود إلى الحافظة
import { type IntlayerConfig } from "intlayer"; const config: IntlayerConfig = { // ... Rest of your config compiler: { /** * Indicates if the compiler should be enabled. */ enabled: true, /** * Defines the output files path */ output: ({ fileName, extension }) => `./${fileName}${extension}`, /** * Indicates if the components should be saved after being transformed. * * - If `true`, the compiler will rewrite the component file in the disk. So the transformation will be permanent, and the compiler will skip the transformation for the next process. That way, the compiler can transform the app, and then it can be removed. * * - If `false`, the compiler will inject the `useIntlayer()` function call into the code in the build output only, and keep the base codebase intact. The transformation will be done only in memory. */ saveComponents: false, /** * Dictionary key prefix */ dictionaryKeyPrefix: "", }, }; export default config;Run the extractor to transform your components and extract the content
bashنسخ الكودنسخ الكود إلى الحافظة
تكوين TypeScript
تستخدم Intlayer تقنية توسيع الوحدات (module augmentation) للاستفادة من TypeScript، مما يجعل برمجتك أكثر قوة.

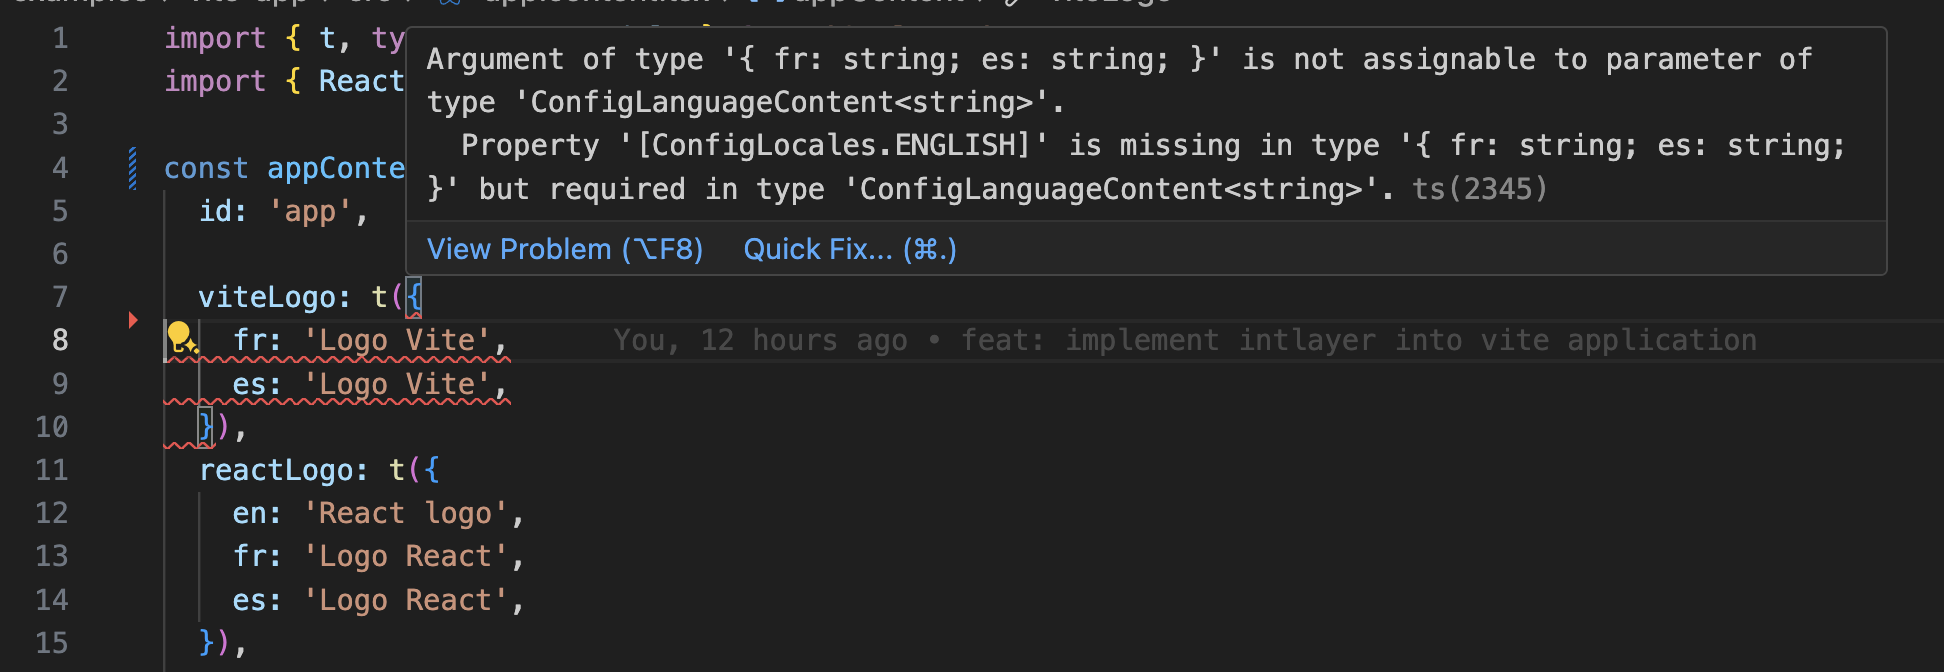
تأكد من أن تكوين TypeScript الخاص بك يتضمن الأنواع المولدة تلقائيًا.
نسخ الكود إلى الحافظة
تكوين Git
يوصى بتجاهل الملفات التي تنشئها Intlayer. هذا يتجنب إضافتها إلى مستودع Git الخاص بك.
للقيام بذلك، أضف التعليمات التالية إلى ملف .gitignore الخاص بك:
نسخ الكود إلى الحافظة
إضافة VS Code
لتحسين تجربة التطوير الخاصة بك مع Intlayer، يمكنك تثبيت إضافة Intlayer الرسمية لـ VS Code.
التثبيت من VS Code Marketplace
توفر هذه الإضافة:
- إكمال تلقائي لمفاتيح الترجمة.
- اكتشاف الأخطاء في الوقت الفعلي للترجمات المفقودة.
- معاينة مضمنة للمحتوى المترجم.
- إجراءات سريعة لإنشاء وتحديث الترجمات بسهولة.
لمزيد من المعلومات حول استخدام الإضافة، راجع توثيق إضافة VS Code.
تعمق أكثر
إذا كنت تريد معرفة المزيد، يمكنك أيضًا تنفيذ المحرر المرئي أو استخدام نظام إدارة المحتوى (CMS) لإخراج محتواك خارجيًا.