이 페이지와 원하는 AI 어시스턴트를 사용하여 문서를 요약합니다
버전 기록
- "Solid useIntlayer API 사용법을 직접 속성 액세스로 업데이트"v8.9.02026. 5. 4.
- "init 명령어 추가"v7.5.92025. 12. 30.
- "Astro 통합, 설정 및 사용법 업데이트"v6.2.02025. 10. 3.
이 페이지의 콘텐츠는 AI를 사용하여 번역되었습니다.
영어 원본 내용의 최신 버전을 보기이 문서를 개선할 아이디어가 있으시면 GitHub에 풀 리퀘스트를 제출하여 자유롭게 기여해 주세요.
문서에 대한 GitHub 링크문서의 Markdown을 클립보드에 복사
Intlayer를 사용하여 Astro + React 사이트 번역하기 | 국제화 (i18n)
목차
Intlayer란 무엇인가요?
Intlayer는 현대적인 웹 애플리케이션에서 다국어 지원을 단순화하기 위해 설계된 혁신적이고 오픈 소스인 국제화(i18n) 라이브러리입니다.
Intlayer를 사용하면 다음을 할 수 있습니다:
- 번역을 쉽게 관리하세요: 컴포넌트 레벨의 선언적 사전(Dictionaries)을 사용합니다.
- 메타데이터, 라우트 및 콘텐츠를 동적으로 로컬라이즈하세요.
- TypeScript 지원을 보장받으세요: 자동 생성된 타입을 통해 자동 완성 및 오류 감지 기능을 향상시킵니다.
- 고급 기능을 활용하세요: 동적 로케일 감지 및 언어 전환과 같은 기능을 제공합니다.
Astro + React에서 Intlayer 설정을 위한 단계별 가이드
GitHub에서 애플리케이션 템플릿 보기.
1단계: 종속성 설치
선호하는 패키지 관리자를 사용하여 필요한 패키지를 설치합니다:
코드를 클립보드에 복사
npm install intlayer astro-intlayer react react-dom react-intlayer @astrojs/reactnpx intlayer initalt,title,href,aria-label등과 같은문자열속성에서 콘텐츠를 사용하려면 다음과 같이 함수의 값을 사용할 수 있습니다.
html코드 복사코드를 클립보드에 복사
<img src="{content.image.src.value}" alt="{content.image.value}" /><img src="{content.image.src.toString()}" alt="{content.image.toString()}" /><img src="{String(content.image.src)}" alt="{String(content.image)}" />
intlayer 설정 관리, 번역, 콘텐츠 선언, 트랜스파일 및 CLI 명령어를 위한 국제화 도구를 제공하는 핵심 패키지입니다.
astro-intlayer Intlayer를 Vite 번들러와 통합하기 위한 Astro 통합 플러그인과 사용자의 선호 로케일을 감지하고 쿠키를 관리하며 URL 리디렉션을 처리하는 미들웨어가 포함되어 있습니다.
react, react-dom 브라우저에서 React 컴포넌트를 렌더링하는 데 필요한 핵심 React 패키지입니다.
react-intlayer Intlayer를 React 애플리케이션과 통합하는 패키지입니다. React의 국제화를 위한
IntlayerProvider,useIntlayer및useLocale훅을 제공합니다.@astrojs/react React 컴포넌트 아일랜드를 사용할 수 있게 해주는 공식 Astro 통합 도구입니다.
2단계: 프로젝트 설정
애플리케이션의 언어를 설정하기 위한 설정 파일을 생성합니다:
코드를 클립보드에 복사
import { Locales, type IntlayerConfig } from "intlayer";const config: IntlayerConfig = { internationalization: { locales: [ Locales.ENGLISH, Locales.FRENCH, Locales.SPANISH, // 기타 로케일 ], defaultLocale: Locales.ENGLISH, },};export default config;이 설정 파일을 통해 로컬라이즈된 URL, 미들웨어 리디렉션, 쿠키 이름, 콘텐츠 선언 위치 및 확장자 설정, 콘솔의 Intlayer 로그 비활성화 등을 구성할 수 있습니다. 사용 가능한 파라미터의 전체 목록은 설정 문서를 참조하세요.
3단계: Astro 설정에 Intlayer 통합
Astro 설정에 intlayer 플러그인과 React 통합을 추가합니다.
코드를 클립보드에 복사
// @ts-checkimport { intlayer } from "astro-intlayer";import react from "@astrojs/react";import { defineConfig } from "astro/config";// https://astro.build/configexport default defineConfig({ integrations: [intlayer(), react()],});intlayer() 통합 플러그인은 Intlayer를 Astro와 통합하는 데 사용됩니다. 콘텐츠 선언 파일의 빌드를 보장하고 개발 모드에서 이를 감시합니다. Astro 애플리케이션 내에서 Intlayer 환경 변수를 정의하며, 성능 최적화를 위한 에일리어스(alias)를 제공합니다.
react()통합은client:only="react"를 통해 React 컴포넌트 아일랜드를 사용할 수 있게 합니다.
4단계: 콘텐츠 선언
번역을 저장하기 위해 콘텐츠 선언을 생성하고 관리합니다:
코드를 클립보드에 복사
import { t, type Dictionary } from "intlayer";import type { ReactNode } from "react";const appContent = { key: "app", content: { title: t({ en: "Hello World", fr: "Bonjour le monde", es: "Hola mundo", ko: "안녕하세요", }), },} satisfies Dictionary;export default appContent;콘텐츠 선언은contentDir(기본값./src)에 포함되어 있고 콘텐츠 선언 파일 확장자(기본값.content.{json,ts,tsx,js,jsx,mjs,cjs})와 일치한다면 애플리케이션 어디에서나 정의할 수 있습니다.
자세한 내용은 콘텐츠 선언 문서를 참조하세요.
5단계: Astro에서 콘텐츠 사용
intlayer에서 내보낸 핵심 헬퍼를 사용하여 .astro 파일에서 직접 사전을 소비할 수 있습니다. 또한 각 페이지에 hreflang 및 canonical 링크와 같은 SEO 메타데이터를 추가하고, 클라이언트 사이드의 인터랙티브 콘텐츠를 위해 React 아일랜드를 포함해야 합니다.
코드를 클립보드에 복사
---import { getIntlayer, getLocaleFromPath, getLocalizedUrl, getHTMLTextDir, getPrefix, localeMap, defaultLocale, type LocalesValues,} from "intlayer";import { ReactIsland } from "../../components/react/ReactIsland";export const getStaticPaths = () => { return localeMap(({ locale }) => ({ params: { locale: getPrefix(locale).localePrefix }, }));};const locale = getLocaleFromPath(Astro.url.pathname) as LocalesValues;const { title } = getIntlayer("app", locale);---<!doctype html><html lang={locale} dir={getHTMLTextDir(locale)}> <head> <meta charset="utf-8" /> <meta name="viewport" content="width=device-width" /> <link rel="icon" type="image/svg+xml" href="/favicon.svg" /> <title>{title}</title> <!-- Canonical 링크: 검색 엔진에 이 페이지의 주 버전임을 알립니다 --> <link rel="canonical" href={new URL(getLocalizedUrl(Astro.url.pathname, locale), Astro.site)} /> <!-- Hreflang: 모든 로컬라이즈된 버전에 대해 Google에 알립니다 --> { localeMap(({ locale: mapLocale }) => ( <link rel="alternate" hreflang={mapLocale} href={new URL( getLocalizedUrl(Astro.url.pathname, mapLocale), Astro.site )} /> )) } <!-- x-default: 일치하는 언어가 없는 사용자를 위한 폴백(fallback) 옵션 --> <link rel="alternate" hreflang="x-default" href={new URL( getLocalizedUrl(Astro.url.pathname, defaultLocale), Astro.site )} /> </head> <body> <!-- React 아일랜드는 언어 전환기를 포함한 모든 인터랙티브 콘텐츠를 렌더링합니다 --> <ReactIsland locale={locale} client:only="react" /> </body></html>라우팅 설정에 관한 참고 사항: 사용하는 디렉토리 구조는
intlayer.config.ts의middleware.routing설정에 따라 달라집니다:
prefix-no-default(기본값): 루트(프레픽스 없음)에 기본 언어를 유지하고 나머지에 프레픽스를 붙입니다. 모든 케이스를 처리하려면[...locale]을 사용하세요.prefix-all: 모든 URL에 언어 프레픽스가 붙습니다. 루트를 분리해서 처리할 필요가 없다면 표준[locale]을 사용할 수 있습니다.search-param또는no-prefix: 로케일 폴더가 필요 없습니다. 로케일은 검색 파라미터나 쿠키를 통해 처리됩니다.
6단계: React 아일랜드 컴포넌트 생성
React 애플리케이션을 감싸고 서버에서 감지된 로케일을 전달받는 아일랜드 컴포넌트를 생성합니다:
코드를 클립보드에 복사
/** @jsxImportSource react */import { IntlayerProvider, useIntlayer } from "react-intlayer";import { type LocalesValues } from "intlayer";import { LocaleSwitcher } from "./LocaleSwitcher";function App() { const { title } = useIntlayer("app"); return ( <div> <h1>{title}</h1> <LocaleSwitcher /> </div> );}export function ReactIsland({ locale }: { locale: LocalesValues }) { return ( <IntlayerProvider locale={locale}> <App /> </IntlayerProvider> );}locale프롭은 Astro 페이지(서버 감지)에서IntlayerProvider로 전달되어 트리 내 모든 React 훅의 초기 로케일이 됩니다.
7단계: 언어 전환기 추가
사용 가능한 로케일을 읽고 사용자가 새 언어를 선택할 때 로컬라이즈된 URL로 이동하는 React 컴포넌트 LocaleSwitcher를 생성합니다:
코드를 클립보드에 복사
/** @jsxImportSource react */import { useLocale } from "react-intlayer";import { getLocalizedUrl, getLocaleName, type LocalesValues } from "intlayer";export function LocaleSwitcher() { const { locale, availableLocales, setLocale } = useLocale({ onLocaleChange: (newLocale: LocalesValues) => { // 언어 변경 시 로컬라이즈된 URL로 이동 window.location.href = getLocalizedUrl( window.location.pathname, newLocale ); }, }); return ( <div className="locale-switcher"> <span className="switcher-label">언어 전환:</span> <div className="locale-buttons"> {availableLocales.map((localeItem) => ( <button key={localeItem} onClick={() => setLocale(localeItem)} className={`locale-btn ${localeItem === locale ? "active" : ""}`} disabled={localeItem === locale} > <span className="ls-own-name">{getLocaleName(localeItem)}</span> <span className="ls-current-name"> {getLocaleName(localeItem, locale)} </span> <span class="ls-code">{localeItem.toUpperCase()}</span> </button> ))} </div> </div> );}영속성에 관한 참고 사항:
window.location.href를 통한 리디렉션을 위해onLocaleChange를 사용하면 새 언어 URL이 확실히 방문되도록 보장합니다. 이를 통해 Intlayer 미들웨어가 언어 쿠키를 설정하고 향후 방문 시 사용자의 선호도를 기억할 수 있습니다.
LocaleSwitcher는IntlayerProvider내부에서 렌더링되어야 합니다. 아일랜드 컴포넌트 내에서 사용하세요(6단계 참조).
8단계: Sitemap 및 Robots.txt
Intlayer는 동적으로 로컬라이즈된 사이트맵과 robots.txt 파일을 생성하기 위한 유틸리티를 제공합니다.
사이트맵
Intlayer는 애플리케이션의 사이트맵을 쉽게 만들 수 있는 내장 사이트맵 생성기를 제공합니다. 로컬라이즈된 경로를 처리하고 검색 엔진에 필요한 메타데이터를 추가합니다.
Intlayer에서 생성한 사이트맵은xhtml:link네임스페이스(Hreflang XML 확장)를 지원합니다. 원시 URL만 나열하는 기본 사이트맵 생성기와 달리, Intlayer는 페이지의 모든 언어 버전(예:/about,/about?lang=fr,/about?lang=es) 간에 필요한 양항향 링크를 자동으로 생성합니다. 이를 통해 검색 엔진이 올바른 언어 버전을 올바른 사용자에게 색인화하고 제공할 수 있도록 보장합니다.
모든 로컬라이즈된 경로를 포함하는 사이트맵을 생성하기 위해 src/pages/sitemap.xml.ts를 생성합니다.
코드를 클립보드에 복사
import type { APIRoute } from "astro";import { generateSitemap, type SitemapUrlEntry } from "intlayer";const pathList: SitemapUrlEntry[] = [ { path: "/", changefreq: "daily", priority: 1.0 }, { path: "/about", changefreq: "monthly", priority: 0.7 },];const SITE_URL = import.meta.env.SITE ?? "http://localhost:4321";export const GET: APIRoute = async ({ site }) => { const xmlOutput = generateSitemap(pathList, { siteUrl: SITE_URL }); return new Response(xmlOutput, { headers: { "Content-Type": "application/xml" }, });};Robots.txt
검색 엔진 크롤링을 제어하기 위해 src/pages/robots.txt.ts를 생성합니다.
코드를 클립보드에 복사
import type { APIRoute } from "astro";import { getMultilingualUrls } from "intlayer";const getAllMultilingualUrls = (urls: string[]) => urls.flatMap((url) => Object.values(getMultilingualUrls(url)) as string[]);const disallowedPaths = getAllMultilingualUrls(["/admin", "/private"]);export const GET: APIRoute = ({ site }) => { const robotsTxt = [ "User-agent: *", "Allow: /", ...disallowedPaths.map((path) => `Disallow: ${path}`), "", `Sitemap: ${new URL("/sitemap.xml", site).href}`, ].join("\n"); return new Response(robotsTxt, { headers: { "Content-Type": "text/plain" }, });};TypeScript 설정
Intlayer는 모듈 증강(module augmentation)을 사용하여 TypeScript의 이점을 활용함으로써 코드베이스를 더 견고하게 만듭니다.

TypeScript 설정에 자동 생성된 타입이 포함되어 있는지 확인하세요.
코드를 클립보드에 복사
{ // ... 기존 TypeScript 설정 "include": [ // ... 기존 TypeScript 설정 ".intlayer/**/*.ts", // 자동 생성된 타입 포함 ],}Git 설정
Intlayer가 생성한 파일은 무시하는 것이 좋습니다. 이를 통해 Git 리포지토리에 커밋되는 것을 방지할 수 있습니다.
무시하려면 .gitignore 파일에 다음 지침을 추가하세요:
코드를 클립보드에 복사
# Intlayer가 생성한 파일 무시.intlayerVS Code 확장 프로그램
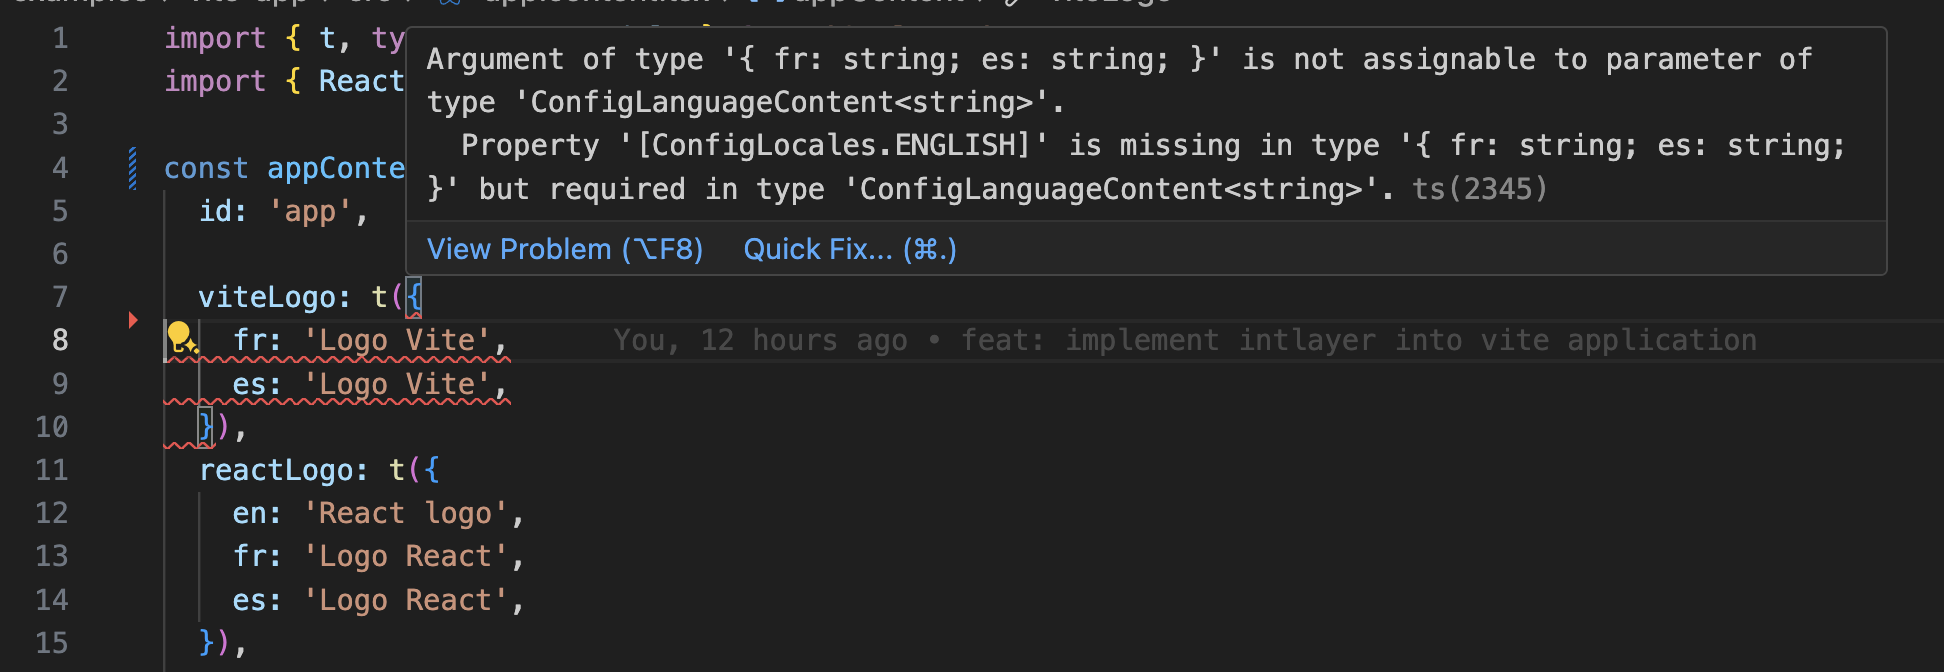
Intlayer 개발 환경을 개선하기 위해 공식 Intlayer VS Code 확장 프로그램을 설치할 수 있습니다.
이 확장 프로그램은 다음 기능을 제공합니다:
- 번역 키 자동 완성.
- 누락된 번역에 대한 실시간 오류 감지.
- 번역된 콘텐츠의 인라인 미리보기.
- 번역을 쉽게 생성하고 업데이트할 수 있는 빠른 작업(Quick Actions).
확장 프로그램 사용에 대한 자세한 내용은 Intlayer VS Code 확장 프로그램 문서를 참조하세요.
15단계: 컴포넌트에서 콘텐츠 추출(선택 사항)
기존 코드베이스가 있는 경우 수천 개의 파일을 변환하는 데 시간이 많이 걸릴 수 있습니다.
이 프로세스를 용이하게 하기 위해 Intlayer는 컴포넌트를 변환하고 콘텐츠를 추출하기 위한 컴파일러 / 추출기를 제안합니다.
설정하려면 intlayer.config.ts 파일에 compiler 섹션을 추가할 수 있습니다.
코드를 클립보드에 복사
import { type IntlayerConfig } from "intlayer";const config: IntlayerConfig = { // ... 나머지 구성 compiler: { /** * 컴파일러 활성화 여부를 나타냅니다. */ enabled: true, /** * 출력 파일 경로를 정의합니다. */ output: ({ fileName, extension }) => `./${fileName}${extension}`, /** * 변환 후 컴포넌트를 저장할지 여부를 나타냅니다. 그렇게 하면 컴파일러를 한 번만 실행하여 앱을 변환한 다음 제거할 수 있습니다. */ saveComponents: false, /** * 사전 키 접두사 */ dictionaryKeyPrefix: "", },};export default config;컴포넌트를 변환하고 콘텐츠를 추출하기 위해 추출기를 실행합니다
코드를 클립보드에 복사
npx intlayer extract