
Ask your question and get a summary of the document by referencing this page and the AI provider of your choice
Version History
- "Update Solid useIntlayer API usage to direct property access"v8.9.004/05/2026
- "Add init command"v7.5.930/12/2025
- "Added mention of `x-default` in `alternates` object"v7.0.601/11/2025
- "Initial history"v7.0.029/06/2025
The content of this page was translated using an AI.
See the last version of the original content in EnglishIf you have an idea for improving this documentation, please feel free to contribute by submitting a pull request on GitHub.
GitHub link to the documentationCopy doc Markdown to clipboard
Translate your Next.js 16 website using Intlayer | Internationalisation (i18n)
See Application Template on GitHub.
Table of Contents
Why Intlayer over alternatives?
Compared to main solutions like next-intl or i18next, Intlayer is a solution that comes with integrated optimizations such as:
Intlayer is optimized to work with Server Components for efficient rendering and is fully compatible with Turbopack. It does not block static rendering and offers middleware as well as all the features needed for scaling internationalization (i18n).
Intlayer is compatible with Next.js 12, 13, 14, 15, and 16. If you are using the Next.js Pages Router, you can refer to this guide. Locale routing is useful for SEO, bundle size, and performance. If you don't need it, you can refer to this guide. For Next.js 12, 13, 14, and 15 with the App Router, refer to this guide.
Instead of loading massive JSON files into your pages, load only the necessary content. Intlayer helps reduce your bundle and page sizes by up to 50%.
Scoping your application's content facilitates maintenance for large-scale applications. You can duplicate or delete a single feature folder without the mental burden of reviewing your entire content codebase. Additionally, Intlayer is fully typed to ensure your content's accuracy.
Co-locating content reduces the context needed by Large Language Models (LLMs). Intlayer also comes with a suite of tools, such as a CLI to test for missing translations,LSP, MCP, and agent skills, to make the developer experience (DX) even smoother for AI agents.
Use automation to translate in your CI/CD pipeline using the LLM of your choice at the cost of your AI provider. Intlayer also offers a compiler to automate content extraction, as well as a web platform to help translate in the background.
Connecting massive JSON files to components can lead to performance and reactivity issues. Intlayer optimizes your content loading at build time.
More than just an i18n solution, Intlayer provides an self-hosted visual editor and a full CMS to help you manage your multilingual content in real-time, making collaboration with translators, copywriters, and other team members seamless. Content can be stored locally and/or remotely.
Step-by-Step Guide to Set Up Intlayer in a Next.js Application
Install Dependencies
Install the necessary packages using npm:
bashCopy codeCopy the code to the clipboard
intlayer
The core package that provides internationalisation tools for configuration management, translation, content declaration, transpilation, and CLI commands.
next-intlayer
The package that integrates Intlayer with Next.js. It provides context providers and hooks for Next.js internationalisation. Additionally, it includes the Next.js plugin for integrating Intlayer with Webpack or Turbopack, as well as proxy for detecting the user's preferred locale, managing cookies, and handling URL redirection.
Configure Your Project
Here is the final structure that we will make:
bashCopy codeCopy the code to the clipboard
If you don't want locale routing, intlayer can be used as a simple provider / hook. See this guide for more details.
Create a config file to configure the languages of your application:
intlayer.config.tsCopy codeCopy the code to the clipboard
import { Locales, type IntlayerConfig } from "intlayer";

const config: IntlayerConfig = {
  internationalization: {
    locales: [
      Locales.ENGLISH,
      Locales.FRENCH,
      Locales.SPANISH,
      // Your other locales
    ],
    defaultLocale: Locales.ENGLISH,
  },
};

export default config;
Through this configuration file, you can set up localised URLs, proxy redirection, cookie names, the location and extension of your content declarations, disable Intlayer logs in the console, and more. For a complete list of available parameters, refer to the configuration documentation.
Integrate Intlayer in Your Next.js Configuration
Configure your Next.js setup to use Intlayer:
next.config.tsCopy codeCopy the code to the clipboard
import type { NextConfig } from "next";
import { withIntlayer } from "next-intlayer/server";

const nextConfig: NextConfig = {
  /* config options here */
};

export default withIntlayer(nextConfig);
The
withIntlayer()Next.js plugin is used to integrate Intlayer with Next.js. It ensures the building of content declaration files and monitors them in development mode. It defines Intlayer environment variables within the Webpack or Turbopack environments. Additionally, it provides aliases to optimise performance and ensures compatibility with server components.The
withIntlayer()function is a promise function. It allows to prepare the intlayer dictionaries before the build starts. If you want to use it with other plugins, you can await it. Example:tsCopy codeCopy the code to the clipboard
If you want to use it synchronously, you can use the
withIntlayerSync()function. Example:tsCopy codeCopy the code to the clipboard
Intlayer automatically detects whether your project is using webpack or Turbopack based on the command-line flags
--webpack,--turbo, or--turbopack, as well as your current Next.js version.Since
next>=16, if you are using Rspack, you must explicitly force Intlayer to use the webpack configuration by disabling Turbopack:tsCopy codeCopy the code to the clipboard
Define Dynamic Locale Routes
Remove everything from
RootLayoutand replace it with the following code:src/app/layout.tsxCopy codeCopy the code to the clipboard
import type { PropsWithChildren, FC } from "react";
import "./globals.css";

const RootLayout: FC<PropsWithChildren> = ({ children }) => (
  // You can still wrap the children with other providers, Like `next-themes`, `react-query`, `framer-motion`, etc.
  <>{children}</>
);

export default RootLayout;
Keeping the
RootLayoutcomponent empty allows to set thelanganddirattributes to the<html>tag.To implement dynamic routing, provide the path for the locale by adding a new layout in your
[locale]directory:src/app/[locale]/layout.tsxCopy codeCopy the code to the clipboard
import { type NextLayoutIntlayer, IntlayerClientProvider } from "next-intlayer";
import { Inter } from "next/font/google";
import { getHTMLTextDir } from "intlayer";

const inter = Inter({ subsets: ["latin"] });

const LocaleLayout: NextLayoutIntlayer = async ({ children, params }) => {
  const { locale } = await params;
  return (
    <html lang={locale} dir={getHTMLTextDir(locale)}>
      <body className={inter.className}>
        <IntlayerClientProvider locale={locale}>
          {children}
        </IntlayerClientProvider>
      </body>
    </html>
  );
};

export default LocaleLayout;
The
[locale]path segment is used to define the locale. Example:/en-GB/aboutwill refer toen-GBand/fr/abouttofr.At this stage, you will encounter the error:
Error: Missing <html> and <body> tags in the root layout.. This is expected because the/app/page.tsxfile is no longer in use and can be removed. Instead, the[locale]path segment will activate the/app/[locale]/page.tsxpage. Consequently, pages will be accessible via paths like/en,/fr,/esin your browser. To set the default locale as the root page, refer to theproxysetup in step 7.Then, implement the
generateStaticParamsfunction in your application Layout.src/app/[locale]/layout.tsxCopy codeCopy the code to the clipboard
export { generateStaticParams } from "next-intlayer"; // Line to insert const LocaleLayout: NextLayoutIntlayer = async ({ children, params }) => { /*... Rest of the code*/ }; export default LocaleLayout;generateStaticParamsensures that your application pre-builds the necessary pages for all locales, reducing runtime computation and improving the user experience. For more details, refer to the Next.js documentation on generateStaticParams.Intlayer works with
export const dynamic = 'force-static';to ensure that the pages are pre-built for all locales.Declare Your Content
Create and manage your content declarations to store translations:
src/app/[locale]/page.content.tsCopy codeCopy the code to the clipboard
import { t, type Dictionary } from "intlayer";

const pageContent = {
  key: "page",
  content: {
    getStarted: {
      main: t({
        en: "Get started by editing",
        fr: "Commencez par éditer",
        es: "Comience por editar",
      }),
      pageLink: "src/app/page.tsx",
    },
  },
} satisfies Dictionary;

export default pageContent;
Your content declarations can be defined anywhere in your application as soon they are included into the
contentDirdirectory (by default,./src). And match the content declaration file extension (by default,.content.{json,ts,tsx,js,jsx,mjs,cjs,md,mdx,yaml,yml}).For more details, refer to the content declaration documentation.
Utilise Content in Your Code
Access your content dictionaries throughout your application:
src/app/[locale]/page.tsxCopy codeCopy the code to the clipboard
import type { FC } from "react"; import { ClientComponentExample } from "@components/ClientComponentExample"; import { ServerComponentExample } from "@components/ServerComponentExample"; import { type NextPageIntlayer } from "next-intlayer"; import { IntlayerServerProvider, useIntlayer } from "next-intlayer/server"; const PageContent: FC = () => { const content = useIntlayer("page"); return ( <> <p>{content.getStarted.main}</p> <code>{content.getStarted.pageLink}</code> </> ); }; const Page: NextPageIntlayer = async ({ params }) => { const { locale } = await params; return ( <IntlayerServerProvider locale={locale}> <PageContent /> <ServerComponentExample /> <ClientComponentExample /> </IntlayerServerProvider> ); }; export default Page;IntlayerClientProvideris used to provide the locale to client-side components. It can be placed in any parent component, including the layout. However, placing it in a layout is recommended because Next.js shares layout code across pages, making it more efficient. By usingIntlayerClientProviderin the layout, you avoid reinitialising it for every page, improving performance and maintaining a consistent localisation context throughout your application.IntlayerServerProvideris used to provide the locale to the server children. It cannot be set set in the layout.Layout and page cannot share a common server context because the server context system is based on a per-request data store (via React's cache mechanism), causing each "context" to be re-created for different segments of the application. Placing the provider in a shared layout would break this isolation, preventing the correct propagation of the server context values to your server components.
src/components/ClientComponentExample.tsxCopy codeCopy the code to the clipboard
"use client"; import type { FC } from "react"; import { useIntlayer } from "next-intlayer"; export const ClientComponentExample: FC = () => { const content = useIntlayer("client-component-example"); // Create related content declaration return ( <div> <h2>{content.title}</h2> <p>{content.content}</p> </div> ); };src/components/ServerComponentExample.tsxCopy codeCopy the code to the clipboard
import type { FC } from "react";
import { useIntlayer } from "next-intlayer/server";

export const ServerComponentExample: FC = () => {
  const content = useIntlayer("server-component-example"); // Create related content declaration

  return (
    <div>
      <h2>{content.title}</h2>
      <p>{content.content}</p>
    </div>
  );
};
If you want to use your content in a
stringattribute, such asalt,title,href,aria-label, etc., you can use the value of the function, like:htmlCopy codeCopy the code to the clipboard
To Learn more about the
useIntlayerhook, refer to the documentation.Configure Proxy for Locale Detection
OptionalSet up proxy to detect the user's preferred locale:
src/proxy.tsCopy codeCopy the code to the clipboard
export { intlayerProxy as proxy } from "next-intlayer/proxy";

export const config = {
  matcher:
    "/((?!api|static|assets|robots|sitemap|sw|service-worker|manifest|.*\\..*|_next).*)",
};
The
intlayerProxyis used to detect the user's preferred locale and redirect them to the appropriate URL as specified in the configuration. Additionally, it enables saving the user's preferred locale in a cookie.If you need to chain several proxies together (for example,
intlayerProxywith authentication or custom proxies), Intlayer now provides a helper calledmultipleProxies.tsCopy codeCopy the code to the clipboard
Internationalisation of your metadata
OptionalIn the case you want to internationalise your metadata, such as the title of your page, you can use the
generateMetadatafunction provided by Next.js. Inside, you can retrieve the content from thegetIntlayerfunction to translate your metadata.src/app/[locale]/metadata.content.tsCopy codeCopy the code to the clipboard
import { type Dictionary, t } from "intlayer";
import { Metadata } from "next";

const metadataContent = {
  key: "page-metadata",
  content: {
    title: t({
      en: "Create Next App",
      fr: "Créer une application Next.js",
      es: "Crear una aplicación Next.js",
    }),
    description: t({
      en: "Generated by create next app",
      fr: "Généré par create next app",
      es: "Generado por create next app",
    }),
  },
} satisfies Dictionary<Metadata>;

export default metadataContent;
src/app/[locale]/layout.tsx or src/app/[locale]/page.tsxCopy codeCopy the code to the clipboard
import { getIntlayer, getMultilingualUrls } from "intlayer";
import type { Metadata } from "next";
import type { LocalPromiseParams } from "next-intlayer";

export const generateMetadata = async ({
  params,
}: LocalPromiseParams): Promise<Metadata> => {
  const { locale } = await params;

  const metadata = getIntlayer("page-metadata", locale);

  /**
   * Generates an object containing all url for each locale.
   *
   * Example:
   * ```ts
   *  getMultilingualUrls('/about');
   *
   *  // Returns
   *  // {
   *  //   en: '/about',
   *  //   fr: '/fr/about',
   *  //   es: '/es/about',
   *  // }
   * ```
   */
  const multilingualUrls = getMultilingualUrls("/");
  const localizedUrl =
    multilingualUrls[locale as keyof typeof multilingualUrls];

  return {
    ...metadata,
    alternates: {
      canonical: localizedUrl,
      languages: { ...multilingualUrls, "x-default": "/" },
    },
    openGraph: {
      url: localizedUrl,
    },
  };
};

// ... Rest of the code
Note that the
getIntlayerfunction imported fromnext-intlayerreturns your content wrapped in anIntlayerNode, allowing integration with the visual editor. In contrast, thegetIntlayerfunction imported fromintlayerreturns your content directly without additional properties.Alternatively, you can use the
getTranslationfunction to declare your metadata. However, using content declaration files is recommended to automate the translation of your metadata and externalize the content at some point.src/app/[locale]/layout.tsx or src/app/[locale]/page.tsxCopy codeCopy the code to the clipboard
import {
  type IConfigLocales,
  getTranslation,
  getMultilingualUrls,
} from "intlayer";
import type { Metadata } from "next";
import type { LocalPromiseParams } from "next-intlayer";

export const generateMetadata = async ({
  params,
}: LocalPromiseParams): Promise<Metadata> => {
  const { locale } = await params;
  const t = <T>(content: IConfigLocales<T>) => getTranslation(content, locale);

  return {
    title: t<string>({
      en: "My title",
      fr: "Mon titre",
      es: "Mi título",
    }),
    description: t({
      en: "My description",
      fr: "Ma description",
      es: "Mi descripción",
    }),
  };
};

// ... Rest of the code
Learn more about the metadata optimisation on the official Next.js documentation.
Internationalisation of your sitemap.xml and robots.txt
OptionalTo internationalise your
sitemap.xmlandrobots.txt, you can use thegetMultilingualUrlsfunction provided by Intlayer. This function allows you to generate multilingual URLs for your sitemap.src/app/sitemap.tsCopy codeCopy the code to the clipboard
import { getMultilingualUrls } from "intlayer"; import type { MetadataRoute } from "next"; const sitemap = (): MetadataRoute.Sitemap => [ { url: "https://example.com", alternates: { languages: { ...getMultilingualUrls("https://example.com"), "x-default": "https://example.com", }, }, }, { url: "https://example.com/login", alternates: { languages: { ...getMultilingualUrls("https://example.com/login"), "x-default": "https://example.com/login", }, }, }, { url: "https://example.com/register", alternates: { languages: { ...getMultilingualUrls("https://example.com/register"), "x-default": "https://example.com/register", }, }, }, ]; export default sitemap;src/app/robots.tsCopy codeCopy the code to the clipboard
import type { MetadataRoute } from "next";
import { getMultilingualUrls } from "intlayer";

const getAllMultilingualUrls = (urls: string[]) =>
  urls.flatMap((url) => Object.values(getMultilingualUrls(url)) as string[]);

const robots = (): MetadataRoute.Robots => ({
  rules: {
    userAgent: "*",
    allow: ["/"],
    disallow: getAllMultilingualUrls(["/login", "/register"]),
  },
  host: "https://example.com",
  sitemap: `https://example.com/sitemap.xml`,
});

export default robots;
Learn more about the sitemap optimisation on the official Next.js documentation. Learn more about the robots.txt optimisation on the official Next.js documentation.
Change the language of your content
OptionalTo change the language of your content in Next.js, the recommended way is to use the
Linkcomponent to redirect users to the appropriate localised page. TheLinkcomponent enables prefetching of the page, which helps avoid a full page reload.src/components/LocaleSwitcher.tsxCopy codeCopy the code to the clipboard
"use client";

import type { FC } from "react";
import {
  Locales,
  getHTMLTextDir,
  getLocaleName,
  getLocalizedUrl,
} from "intlayer";
import { useLocale } from "next-intlayer";
import Link from "next/link";

export const LocaleSwitcher: FC = () => {
  const { locale, pathWithoutLocale, availableLocales, setLocale } =
    useLocale();

  return (
    <div>
      <button popoverTarget="localePopover">{getLocaleName(locale)}</button>
      <div id="localePopover" popover="auto">
        {availableLocales.map((localeItem) => (
          <Link
            href={getLocalizedUrl(pathWithoutLocale, localeItem)}
            key={localeItem}
            aria-current={locale === localeItem ? "page" : undefined}
            onClick={() => setLocale(localeItem)}
            replace // Will ensure that the "go back" browser button will redirect to the previous page
          >
            <span>
              {/* Locale - e.g. FR */}
              {localeItem}
            </span>
            <span>
              {/* Language in its own Locale - e.g. Français */}
              {getLocaleName(localeItem, locale)}
            </span>
            <span dir={getHTMLTextDir(localeItem)} lang={localeItem}>
              {/* Language in current Locale - e.g. Francés with current locale set to Locales.SPANISH */}
              {getLocaleName(localeItem)}
            </span>
            <span dir="ltr" lang={Locales.ENGLISH}>
              {/* Language in English - e.g. French */}
              {getLocaleName(localeItem, Locales.ENGLISH)}
            </span>
          </Link>
        ))}
      </div>
    </div>
  );
};
An alternative way is to use the
setLocalefunction provided by theuseLocalehook. This function will not allow prefetching the page. See theuseLocalehook documentation for more details.You can also set a function in the
onLocaleChangeoption to trigger a custom function when the locale changes.src/components/LocaleSwitcher.tsxCopy codeCopy the code to the clipboard
Documentation references:
Creating a Localised Link Component
OptionalTo ensure that your application's navigation respects the current locale, you can create a custom
Linkcomponent. This component automatically prefixes internal URLs with the current language. For example, when a French-speaking user clicks on a link to the "About" page, they are redirected to/fr/aboutinstead of/about.This behaviour is useful for several reasons:
- SEO and User Experience: Localised URLs help search engines index language-specific pages correctly and provide users with content in their preferred language.
- Consistency: By using a localised link throughout your application, you guarantee that navigation stays within the current locale, preventing unexpected language switches.
- Maintainability: Centralising the localisation logic in a single component simplifies the management of URLs, making your codebase easier to maintain and extend as your application grows.
Below is the implementation of a localised
Linkcomponent in TypeScript:src/components/Link.tsxCopy codeCopy the code to the clipboard
"use client";

import { getLocalizedUrl } from "intlayer";
import NextLink, { type LinkProps as NextLinkProps } from "next/link";
import { useLocale } from "next-intlayer";
import type { PropsWithChildren, FC } from "react";

/**
 * Utility function to check whether a given URL is external.
 * If the URL starts with http:// or https://, it's considered external.
 */
export const checkIsExternalLink = (href?: string): boolean =>
  /^https?:\/\//.test(href ?? "");

/**
 * A custom Link component that adapts the href attribute based on the current locale.
 * For internal links, it uses `getLocalizedUrl` to prefix the URL with the locale (e.g., /fr/about).
 * This ensures that navigation stays within the same locale context.
 */
export const Link: FC<PropsWithChildren<NextLinkProps>> = ({
  href,
  children,
  ...props
}) => {
  const { locale } = useLocale();
  const isExternalLink = checkIsExternalLink(href.toString());

  // If the link is internal and a valid href is provided, get the localised URL.
  const hrefI18n: NextLinkProps["href"] =
    href && !isExternalLink ? getLocalizedUrl(href.toString(), locale) : href;

  return (
    <NextLink href={hrefI18n} {...props}>
      {children}
    </NextLink>
  );
};
How It Works
Detecting External Links:
The helper functioncheckIsExternalLinkdetermines whether a URL is external. External links are left unchanged because they do not need localisation.Retrieving the Current Locale:
TheuseLocalehook provides the current locale (e.g.,frfor French).Localising the URL:
For internal links (i.e., non-external),getLocalizedUrlis used to automatically prefix the URL with the current locale. This means that if your user is in French, passing/aboutas thehrefwill transform it to/fr/about.Returning the Link:
The component returns an<a>element with the localised URL, ensuring that navigation is consistent with the locale.
By integrating this
Linkcomponent across your application, you maintain a coherent and language-aware user experience while also benefitting from improved SEO and usability.Get the current locale in Server Actions
OptionalIf you need the active locale inside a Server Action (e.g., to localise emails or run locale-aware logic), call
getLocalefromnext-intlayer/server:src/app/actions/getLocale.tsCopy codeCopy the code to the clipboard
The
getLocalefunction follows a cascading strategy to determine the user's locale:- First, it checks the request headers for a locale value that may have been set by the proxy
- If no locale is found in headers, it looks for a locale stored in cookies
- If no cookie is found, it attempts to detect the user's preferred language from their browser settings
- As a last resort, it falls back to the application's configured default locale
This ensures the most appropriate locale is selected based on available context.
Optimise your bundle size
OptionalWhen using
next-intlayer, dictionaries are included in the bundle for every page by default. To optimise bundle size, Intlayer provides an optional SWC plugin that intelligently replaceuseIntlayercalls using macros. This ensures dictionaries are only included in bundles for pages that actually use them.To enable this optimisation, install the
@intlayer/swcpackage. Once installed,next-intlayerwill automatically detect and use the plugin:bashCopy codeCopy the code to the clipboard
Note: This optimisation is only available for Next.js 13 and above.
Note: This package is not installed by default because SWC plugins are still experimental on Next.js. It may change in the future.
Note: If you set the option as
importMode: 'dynamic'orimportMode: 'fetch'(in thedictionaryconfiguration), it will rely on Suspense, so you will have to wrap youruseIntlayercalls in aSuspenseboundary. That means, you will not be able to use theuseIntlayerdirectly at the top level of your Page / Layout component.
Watch dictionaries changes on Turbopack
When using Turbopack as your development server with the next dev command, dictionary changes will not be automatically detected by default.
This limitation occurs because Turbopack cannot run webpack plugins in parallel to monitor changes in your content files. To work around this, you'll need to use the intlayer watch command to run both the development server and the Intlayer build watcher simultaneously.
Copy the code to the clipboard
If you are using next-intlayer@<=6.x.x, you need to keep the --turbopack flag to make the Next.js 16 application work correctly with Turbopack. We recommend using next-intlayer@>=7.x.x to avoid this limitation.
Configure TypeScript
Intlayer use module augmentation to get benefits of TypeScript and make your codebase stronger.

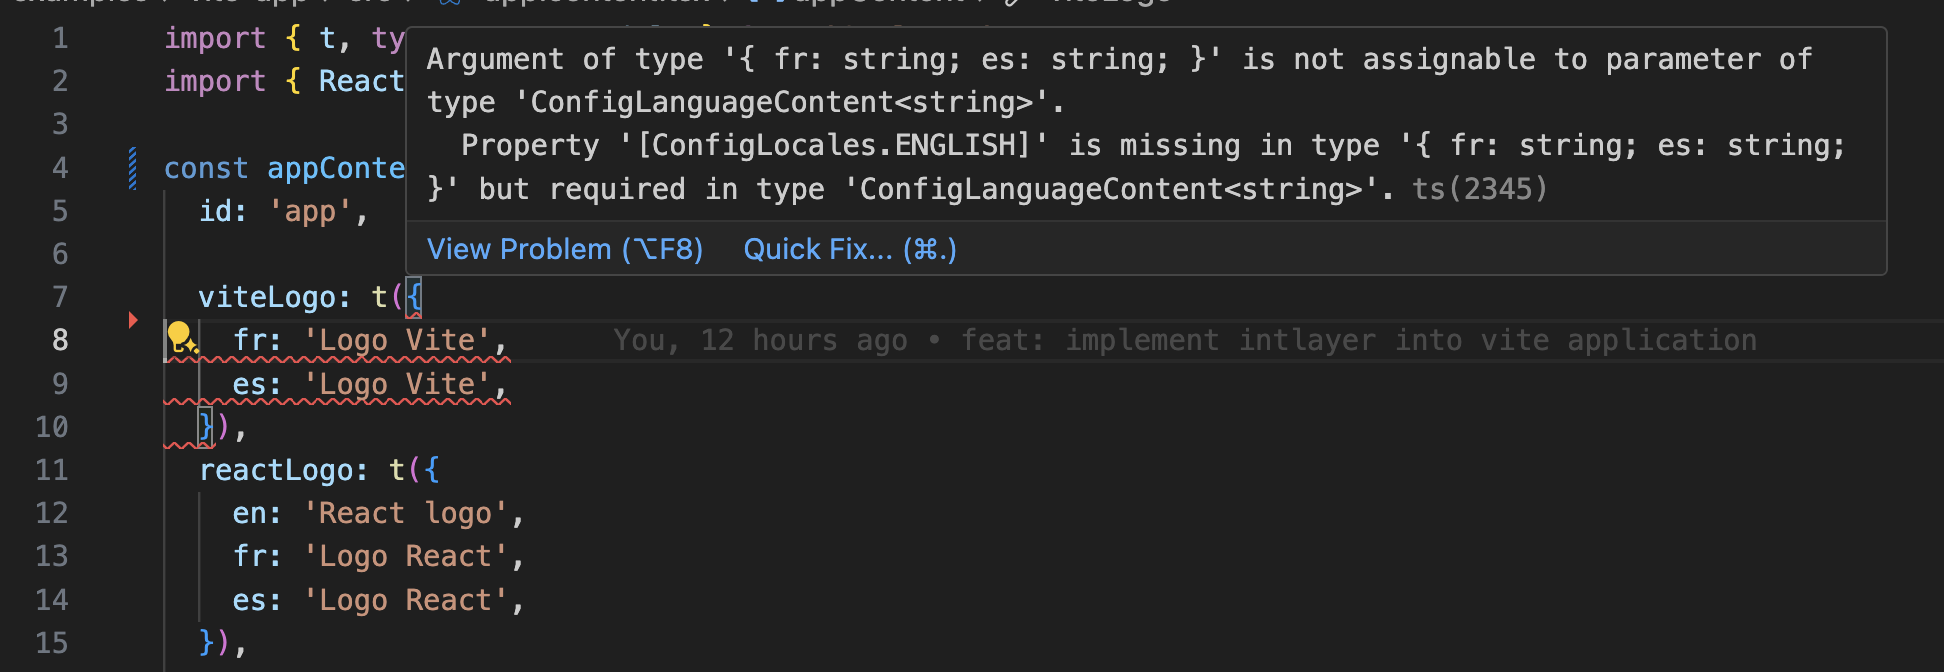
Ensure your TypeScript configuration includes the autogenerated types.
Copy the code to the clipboard
Git Configuration
It is recommended to ignore the files generated by Intlayer. This allows you to avoid committing them to your Git repository.
To do this, you can add the following instructions to your .gitignore file:
Copy the code to the clipboard
VS Code Extension
To improve your development experience with Intlayer, you can install the official Intlayer VS Code Extension.
Install from the VS Code Marketplace
This extension provides:
- Autocompletion for translation keys.
- Real-time error detection for missing translations.
- Inline previews of translated content.
- Quick actions to easily create and update translations.
For more details on how to use the extension, refer to the Intlayer VS Code Extension documentation.
Go Further
To go further, you can implement the visual editor or externalise your content using the CMS.